USMLE Blog
How to Register for USMLE Step 1 (2026)
Complete Guide for IMGs, U.S. & Canadian Medical Students
I hope you enjoy reading this blog post.
If you want our team’s expert help with your USMLE prep, click here
Updated April 2026
USMLE Step 1 registration has changed significantly in 2026, with new platforms, updated workflows, and different pathways depending on whether you are an International Medical Graduate (IMG) or a U.S./Canadian medical student.
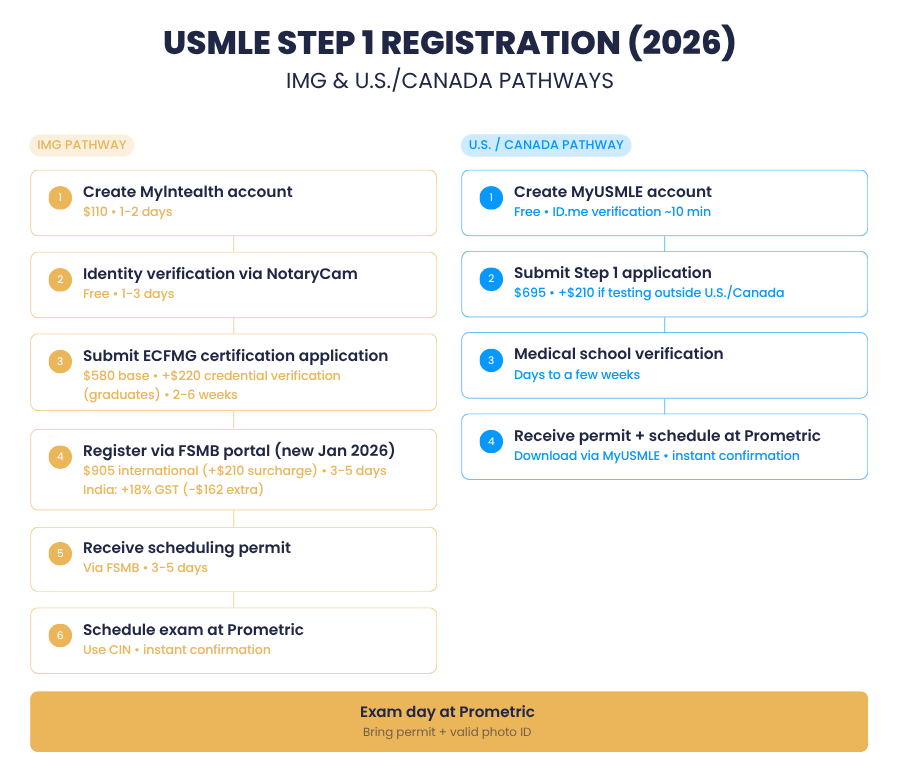
If you are an IMG, your registration involves the MyIntealth portal, identity verification through NotaryCam, ECFMG certification, and final exam registration through the FSMB portal.
If you are a U.S. or Canadian medical student, your process is simpler and fully managed through the NBME via the MyUSMLE portal, with verification handled directly by your medical school.
Because these pathways are completely different, many students get confused about where to start, which portal to use, and what steps are required before they can schedule their exam.
This step-by-step guide to USMLE Step 1 registration (2026) will walk you through both pathways in detail.
After understanding the registration process, the next step is making sure your study strategy is efficient and focused on high-yield content.
Stop wasting valuable time trying to memorize low-yield details. Our Free High-Yield USMLE Step 1 Notes 📚 are designed to help you focus on what actually shows up on the exam, so you can master core concepts faster, even on a tight schedule.
If you want a more structured approach, you can combine these notes with our full course, where we break down each concept in detail and cover additional high-yield topics you need for exam day.
For a full USMLE Step 1 study guide covering schedules, resources, and high-yield strategies, check out our detailed guide here.
Table of Contents
- Registration for International Medical Students
○ Step 1: Create Your MyIntealth Account
○ Step 2: Identity Verification via NotaryCam
○ Step 3: Submitting Your Application for ECFMG Certification
○ Step 4: Registering for the USMLE Step 1 Exam via the FSMB Portal
○ Step 5: Issuing the Scheduling Permit
○ Step 6: How to Schedule Your USMLE Step 1 Exam at Prometric - Registration for U.S. and Canadian Medical Students
○ Step 1: Create Your MyUSMLE Account & Verify Identity
○ Step 2: Submitting the Step 1 Application
○ Step 3: Medical School Verification
○ Step 4: Receiving Your Permit and Scheduling - Frequently Asked Questions (FAQs)
- Summary
Registration for International Medical Students
Step 1: Create Your MyIntealth Account
The very first thing you need to do is establish an account on the new MyIntealth portal, which has officially replaced the old IWA system.
Here is exactly what you need to do to get your account set up and ready for exam registration:
Phase 1: Initial Setup and Email Verification.
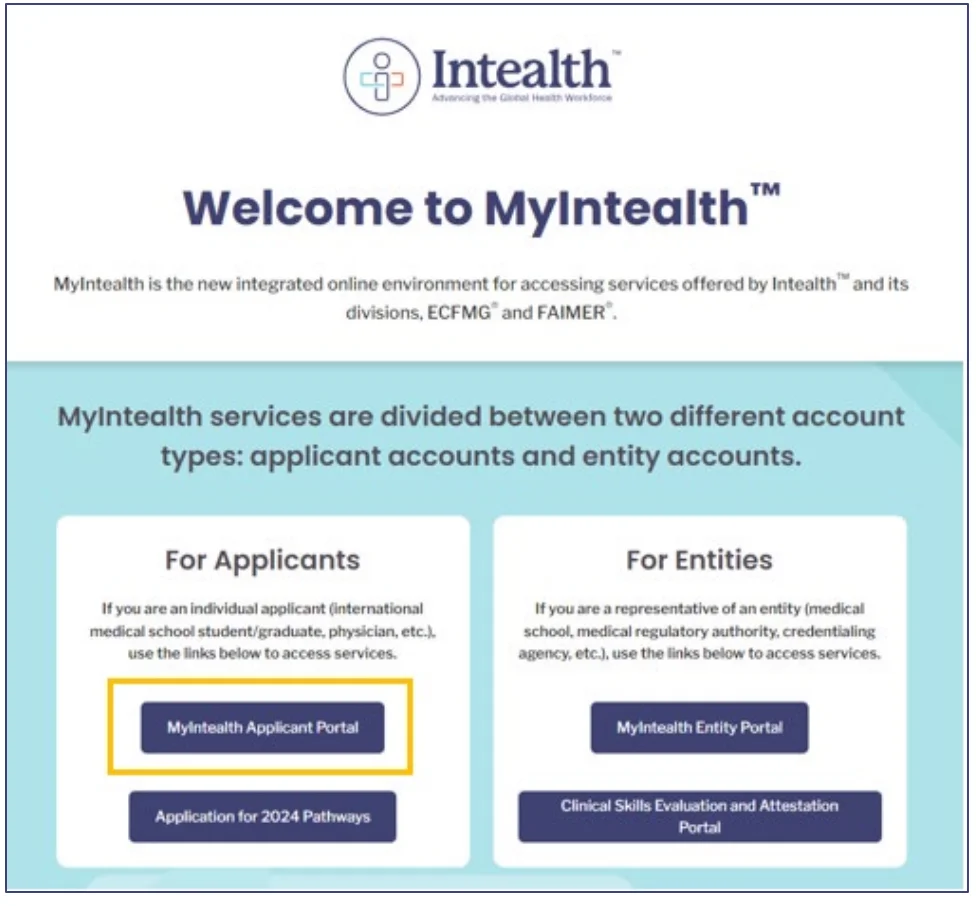
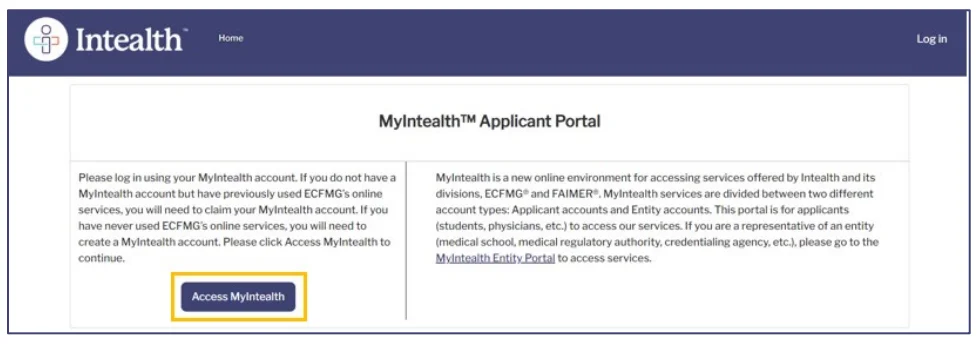
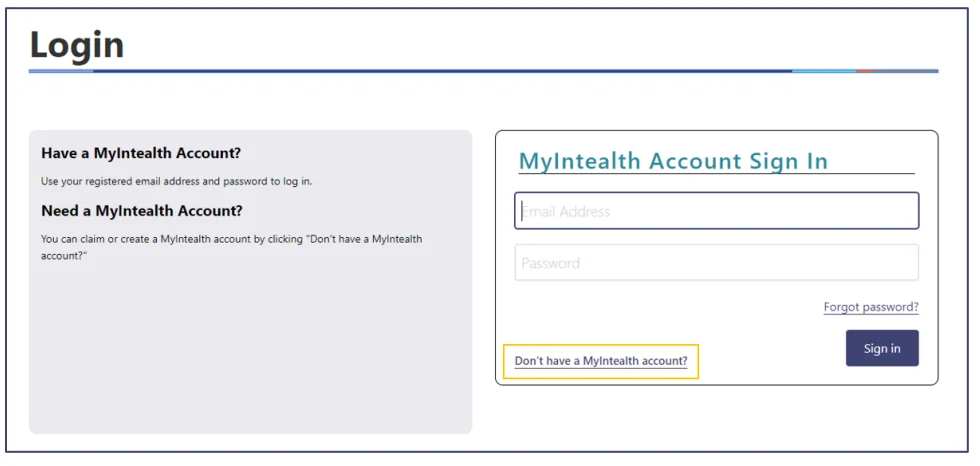
Navigate to the MyIntealth portal and select the Applicant Portal. Click “Access MyIntealth” and then find the link that says “Don’t have a MyIntealth account?”. You will be prompted to enter your email address.
Important note for existing users: If you previously used ECFMG’s online services (like IWA or OASIS), you must use the exact email address associated with your old account so your history transfers over.
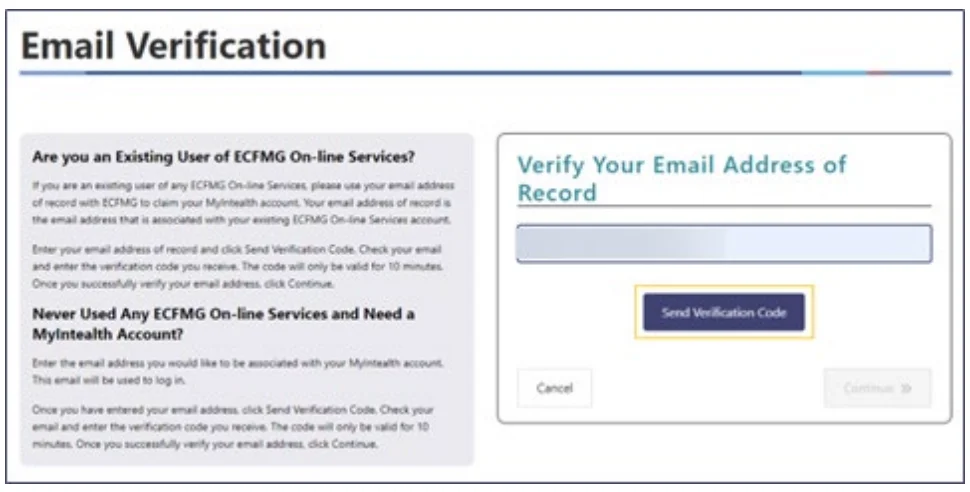
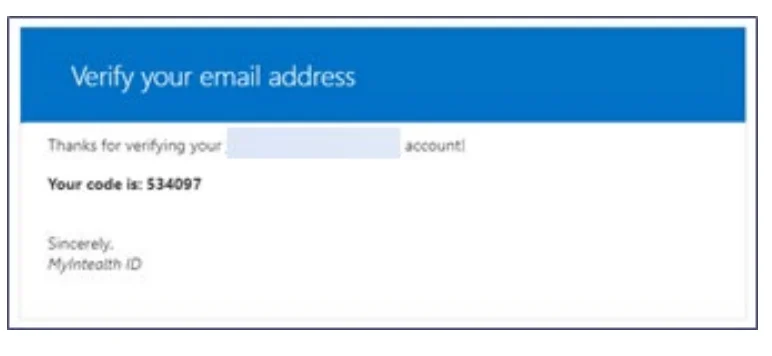
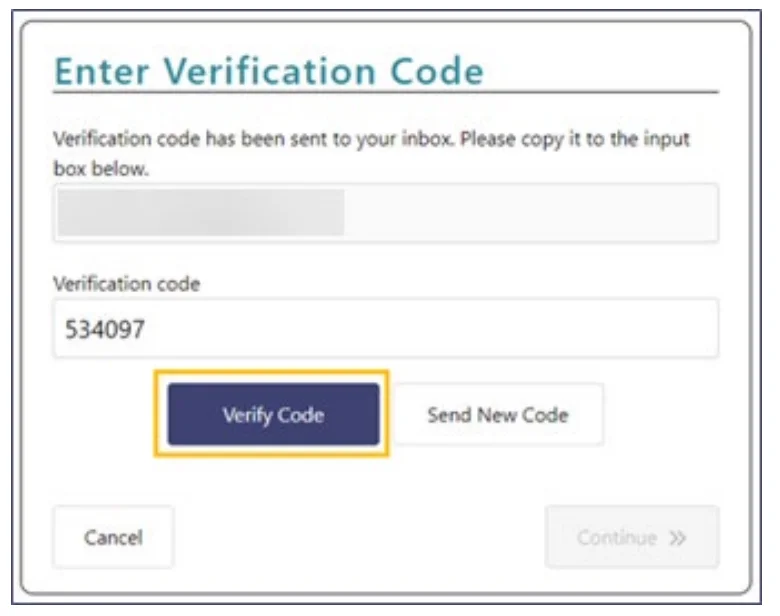
The system will email you a 6-digit verification code. Once you enter this code back on the portal, your email is verified, and you can move forward.
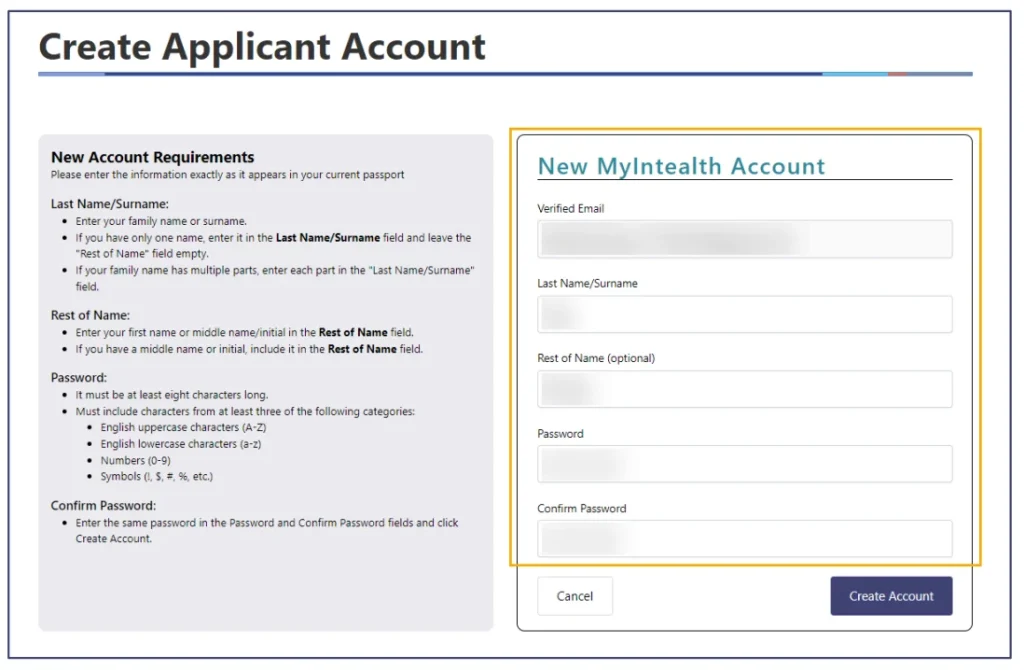
Phase 2: Identity Profile and Password Creation.
Next, you will set up your basic login credentials. You must enter your Last Name/Surname and the Rest of Your Name.
Crucial Step: You must enter your name exactly as it appears on your current, valid passport. If the information you enter differs from your passport, your account request may be delayed or rejected during the identity verification stage.
You will then create a password. The portal requires it to be at least eight characters long and contain characters from at least three of the following categories: uppercase letters, lowercase letters, numbers, and symbols.
✅ Get Full Access to All High-Yield NOTES – For FREE!
To access all the PDFs of the Step 1 High-Yield topics, sign up below and we’ll send them to your inbox — completely free.
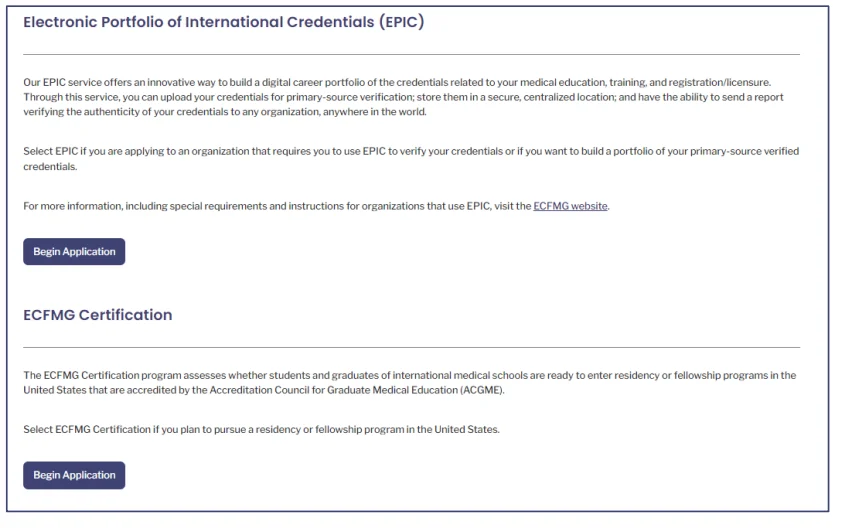
Phase 3: The Account Establishment Application.
Once logged in, you must officially establish your account by starting an application. Click “Begin Application” under the ECFMG Certification tab. You will be asked to fill out several specific sections:
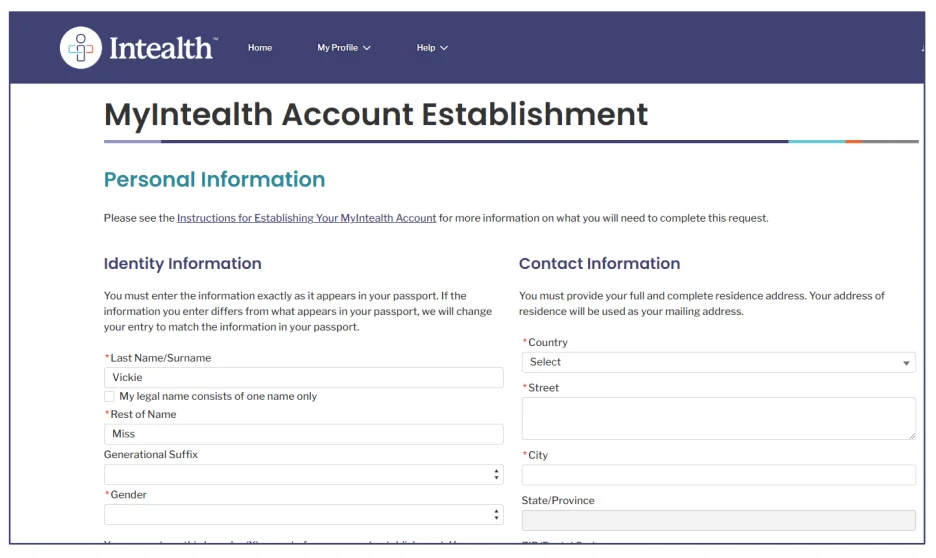
- Identity Information: Confirm your name, date of birth, gender, and generational suffix.
- Contact Information: You must provide your full and complete current residential address. The system explicitly states that you cannot use a P.O. Box or a hospital address here.
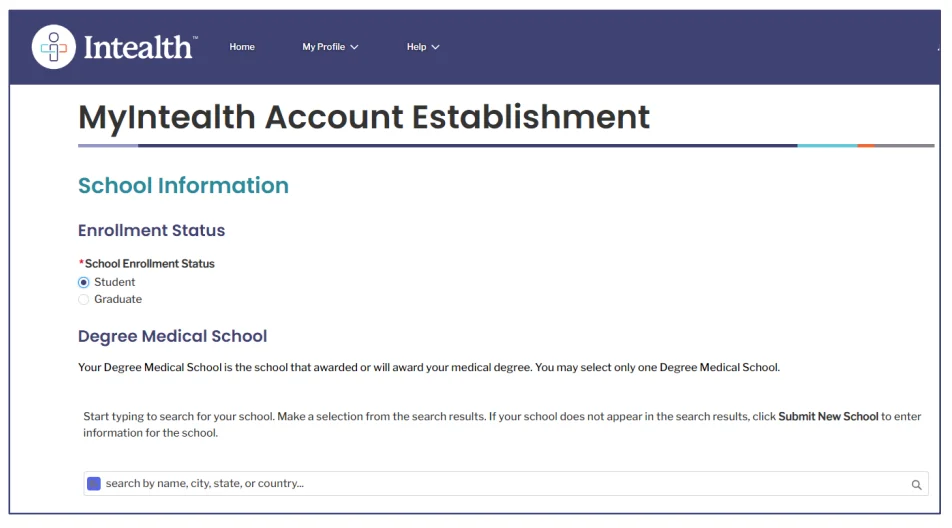
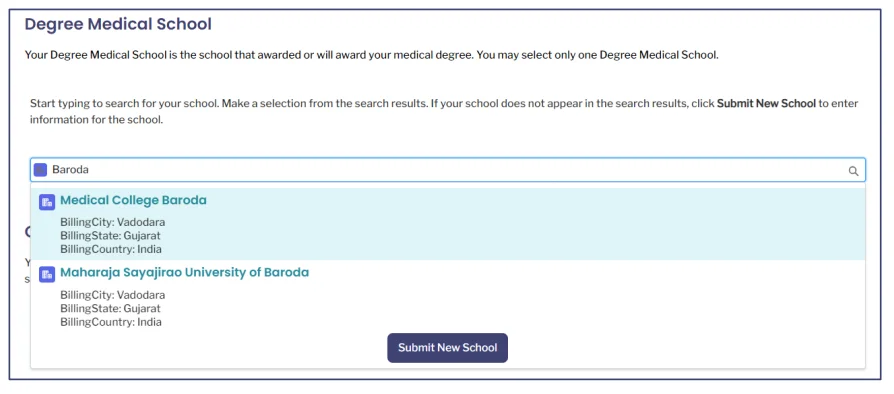
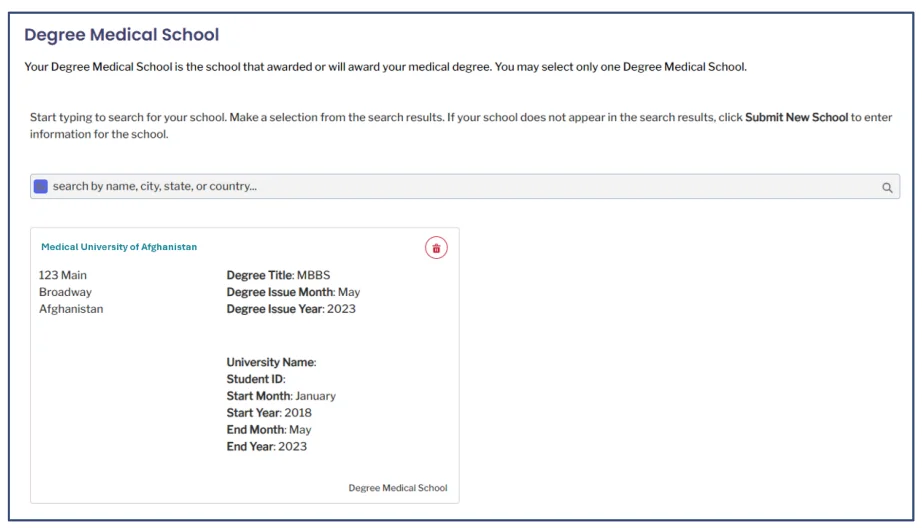
- School Information: Indicate whether you are currently a medical student or a graduate. You will then use a search bar to find the specific medical school that awarded (or will award) your degree. If your school does not appear in the search results, you will need to click “Submit New School” to manually enter your university’s details, including your start and end dates and student ID.
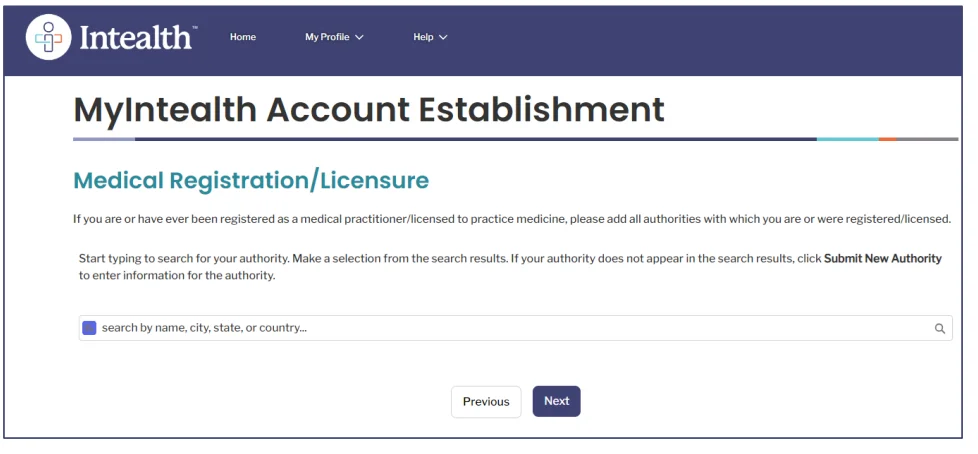
- Medical Registration (Optional): If you are already licensed to practice medicine in another country, you can enter the issuing authority here, though this is voluntary.
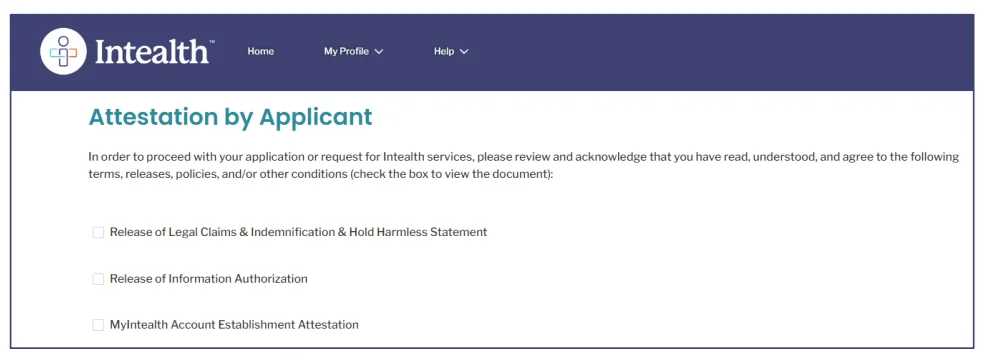
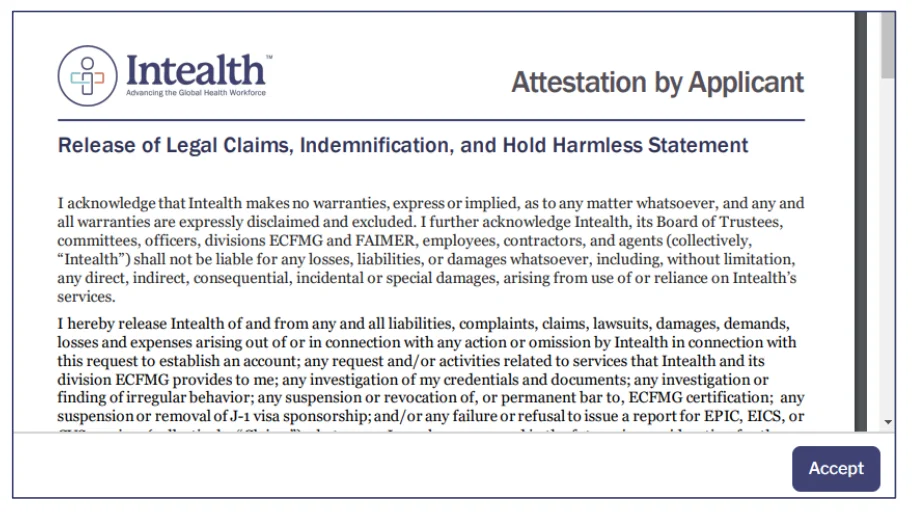
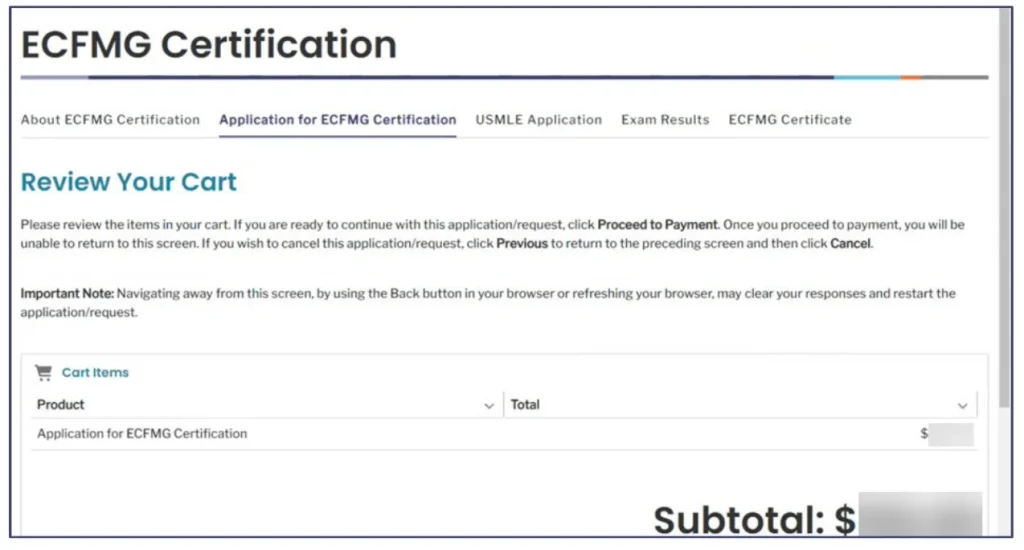
Phase 4: Attestations and Payment.
Before you can finalize the account creation, you have to digitally sign off on a few legal documents. You must read and accept the Release of Legal Claims & Indemnification, the Release of Information Authorization, and the Account Establishment Attestation.
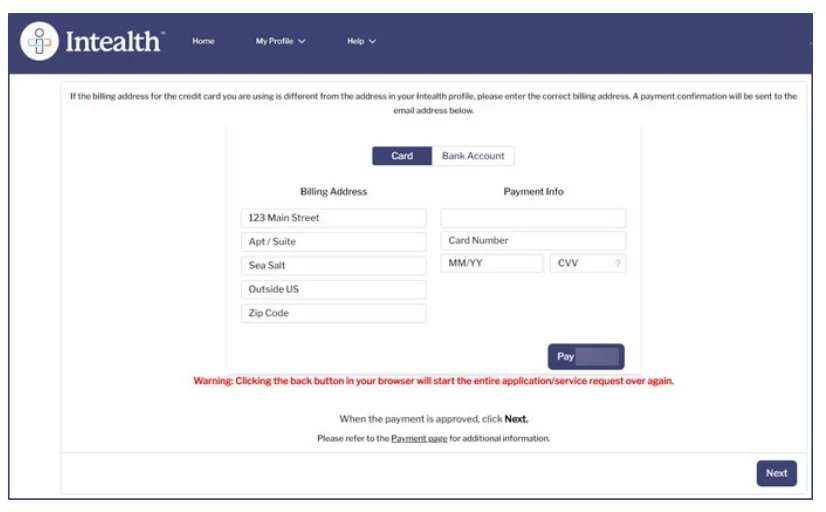
Finally, you will be taken to your cart to pay the $110 Account Establishment fee. You can pay via a major credit/debit card or a linked bank account.
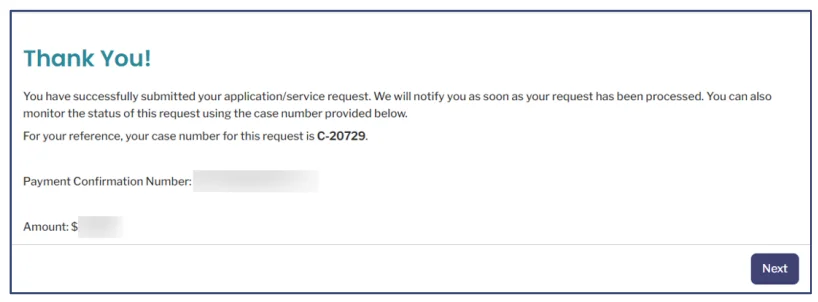
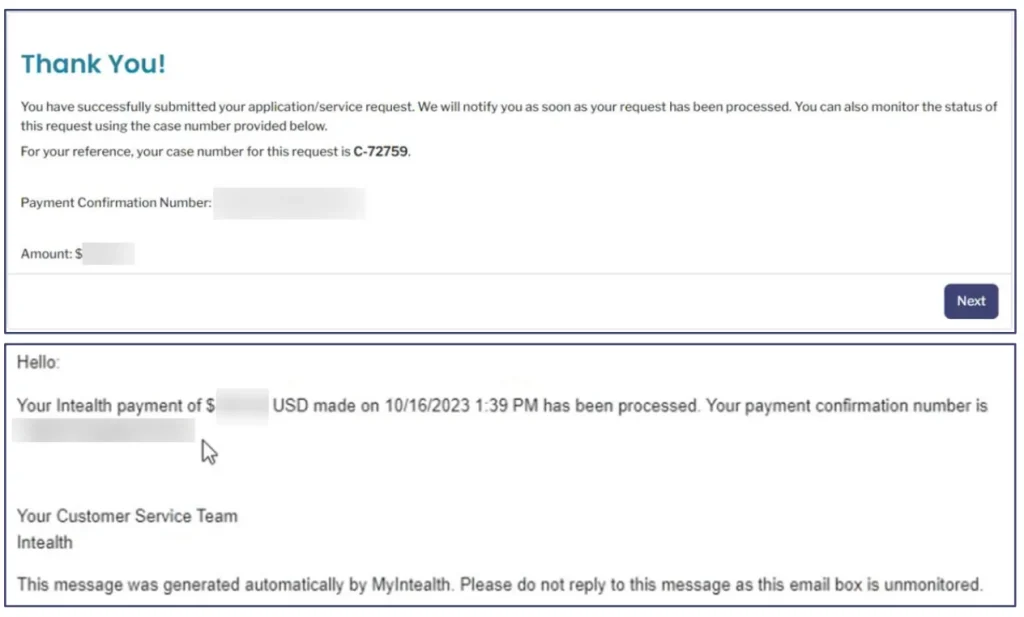
Once your payment is approved, you will see a “Thank You!” screen displaying a specific Case Number (it will look like C-12345). Save this number for your records, as you will need it if you ever have to contact Intealth support regarding your account status.
Step 2: Identity Verification via NotaryCam
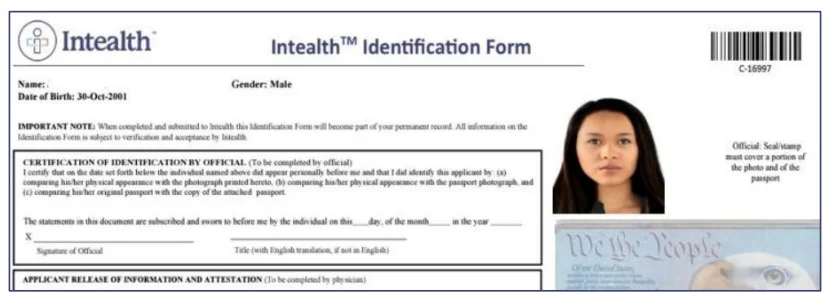
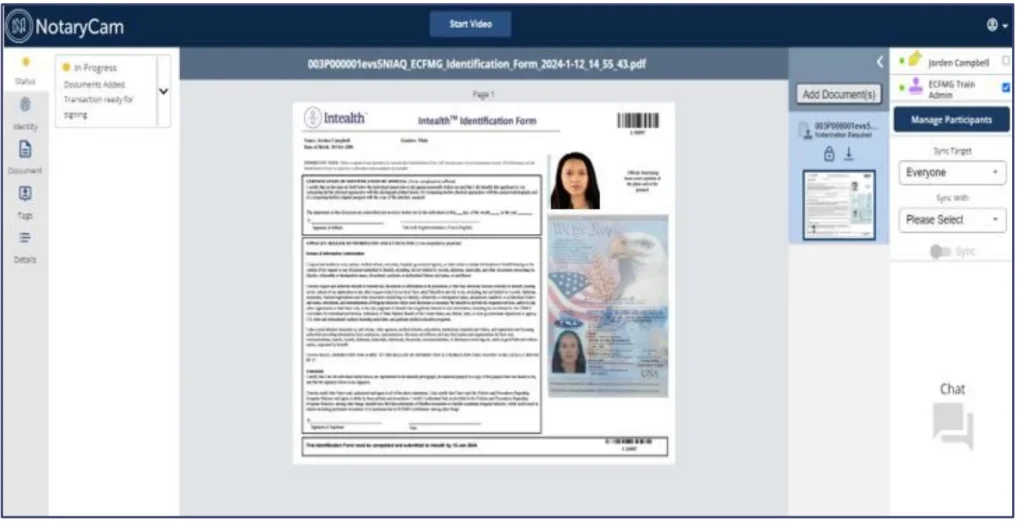
Once your account is set up, you have to complete the Intealth Identification Form (IIF) and verify your identity. You will upload a scan of your passport and do a brief video call with a U.S.-licensed notary through NotaryCam.
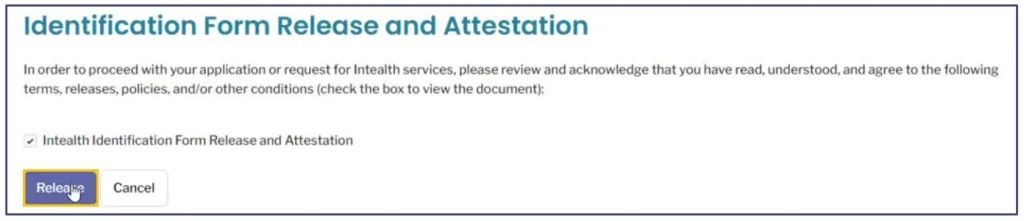
1. Click Continue to access the Release of Identification Form to NotaryCam screen.

2. Click the button to view your newly generated Intealth Identification Form (IIF). This document will open in a new tab.

3. Review the form closely. Ensure that your name, date of birth, and gender exactly match the information on your passport.
4. If everything is accurate, check the attestation box, click Accept, and then hit Release. This action electronically transmits your IIF directly to NotaryCam.
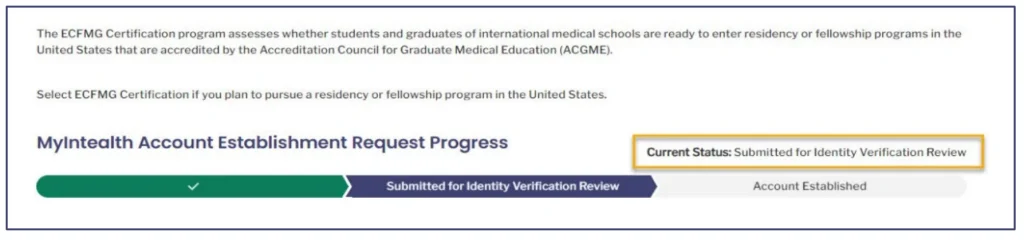
Within 24 hours, you will receive an email from NotaryCam. However, you can also initiate the process directly from your MyIntealth dashboard, where your status will update to “Online Notary Session Created.”

1. Click Continue on your dashboard.

2. The Online Notary Session page will appear. Ensure you are using Google Chrome, have a webcam and microphone, a reliable internet connection, and your physical color passport in hand.
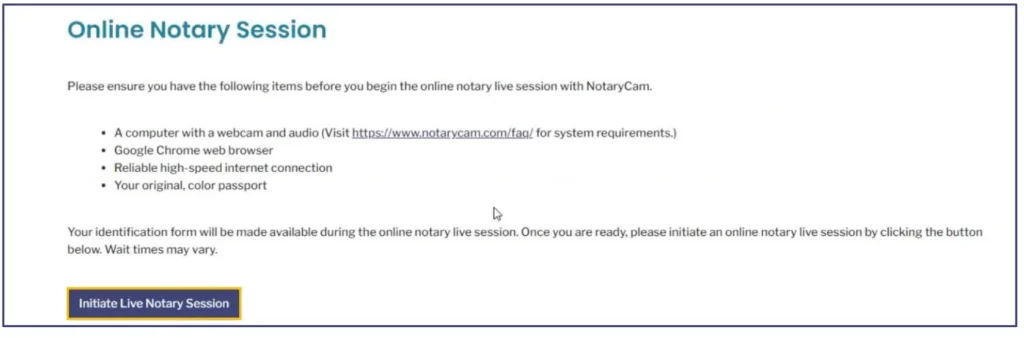
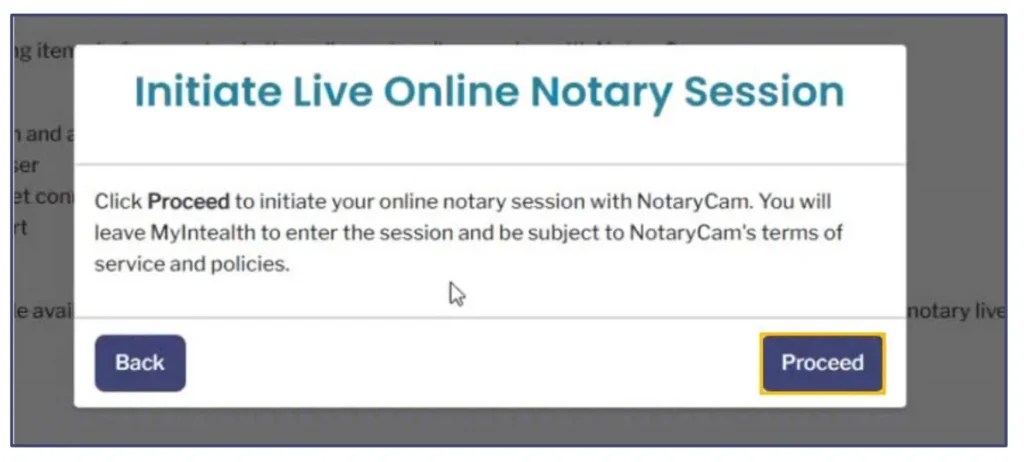
3. Click Initiate Live Notary Session, and then click Proceed on the pop-up to temporarily leave MyIntealth and enter the NotaryCam portal.
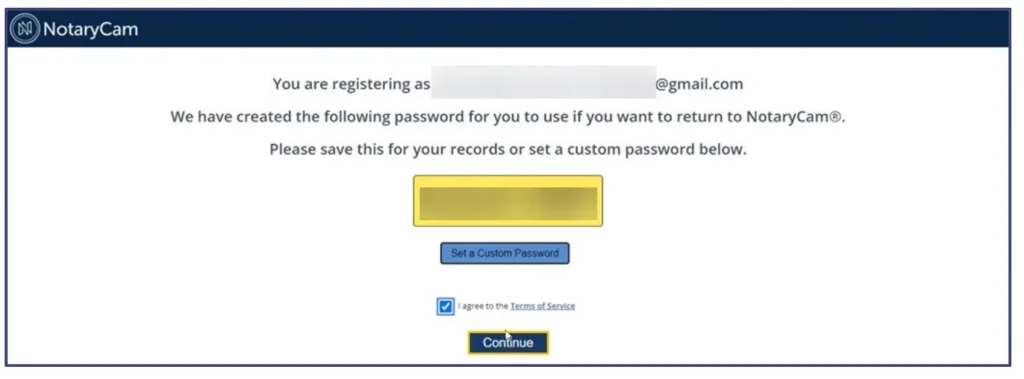
Once you are routed to the NotaryCam website, you must complete the setup before connecting with a representative.
4. Account Setup: NotaryCam will generate a temporary password for you (which you can change to a custom password if you wish). You must check the box to agree to the Terms of Service and click Continue.
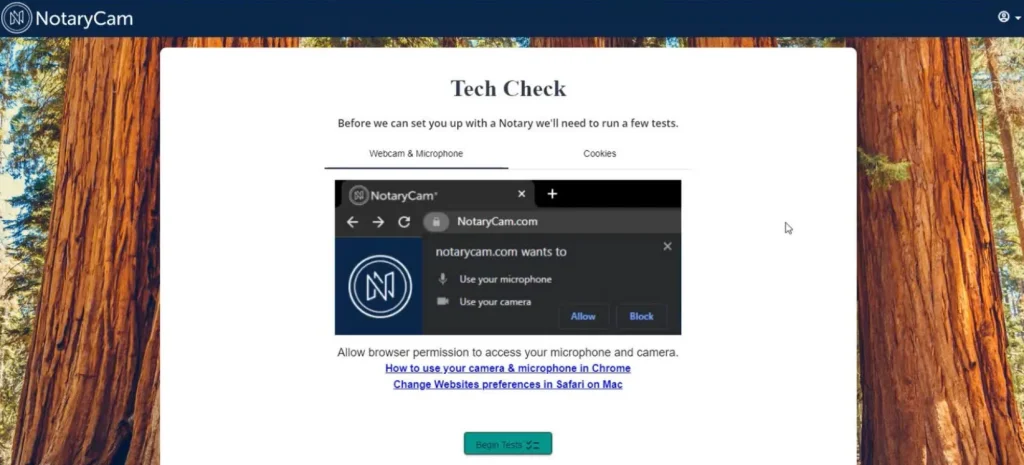
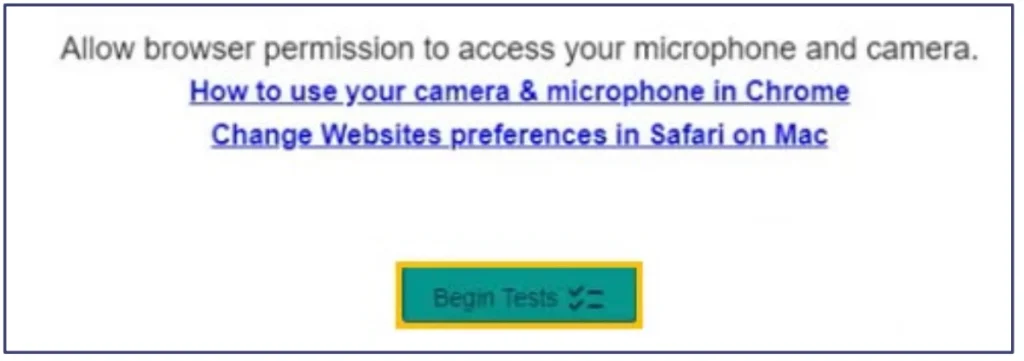
5. Tech Check: A screen will prompt you to allow browser permissions for your microphone and camera. Click “Allow” in your browser, then click the Begin Tests button.
6. Connect with Notary: Your live video session will begin, and you can communicate directly with the NotaryCam representative.
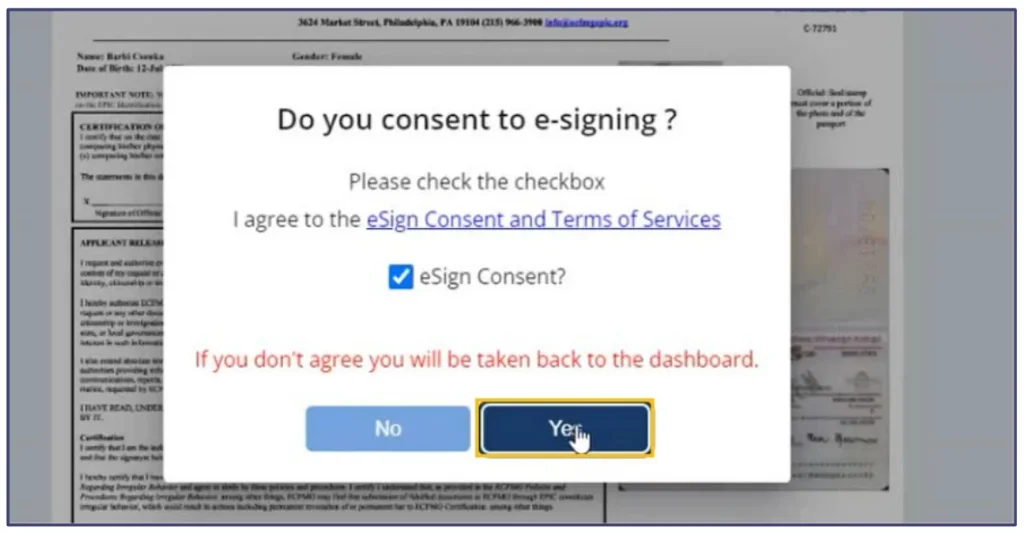
7. Consent to e-Signing: The notary will send a pop-up to your screen asking, “Do you consent to e-signing?”. Check the box labeled I agree to the eSign Consent and Terms of Services, and click Yes.
The notary will now grant you permission to digitally update specific fields on your Intealth Identification Form.
8. Signature of Applicant: When you click the signature line, a Select Signature to Use box will appear. You can choose to Text, Draw, or Upload your signature. Select your preferred style and click Save & Use Signature.

9. Date: Click the date field and use the digital calendar tool to select the current date of completion.
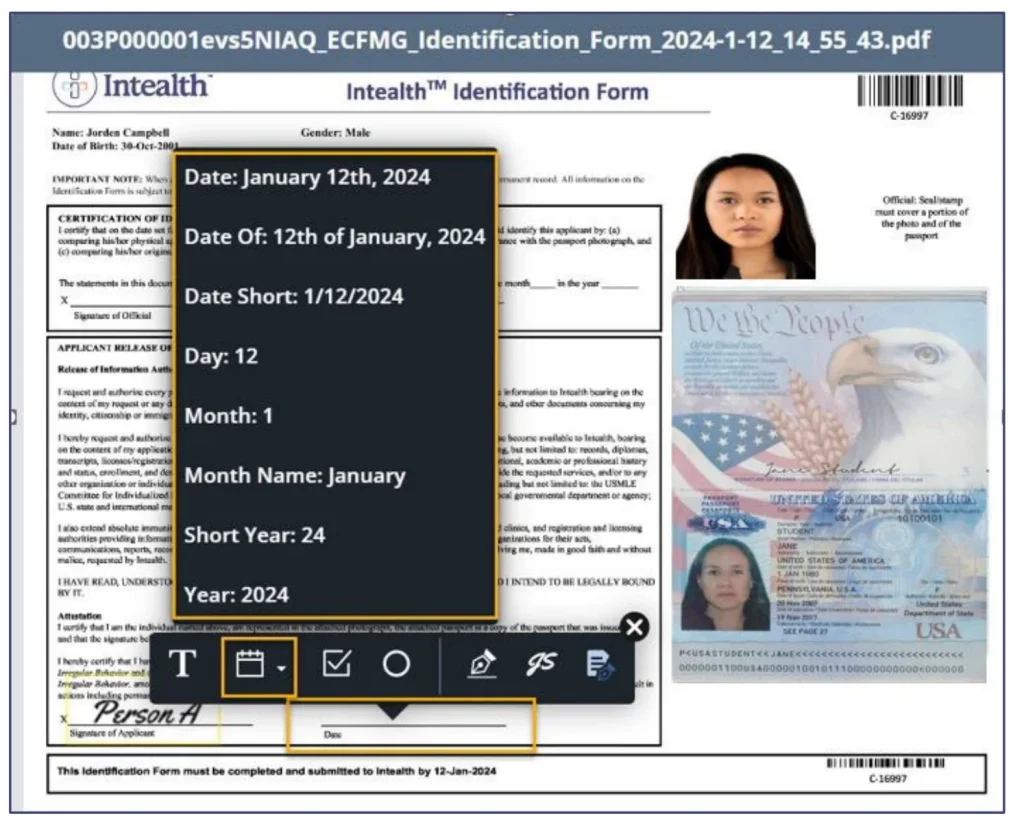
10. Notary Verification: The notary will inspect your physical passport on camera. They will then complete their designated section on the form and digitally affix their official seal.
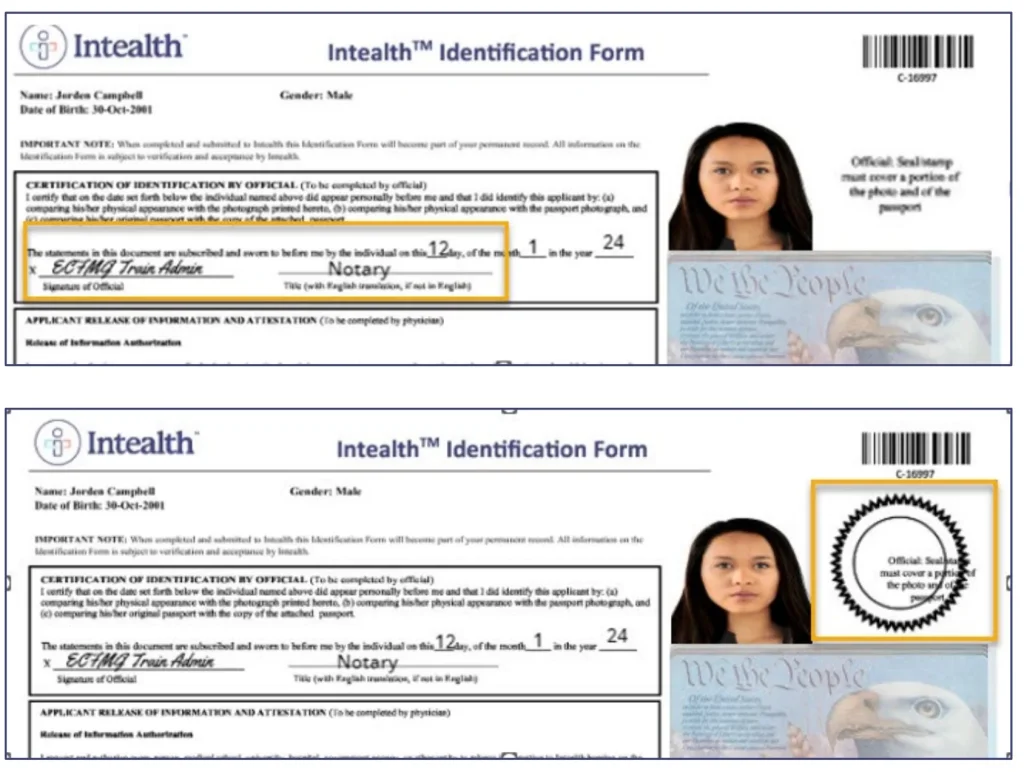
11. Session Complete: The notary locks the document, ending the interview. The finalized form is automatically transmitted back to Intealth for review.
12. Cost: Free (included with account setup).
13. Estimated Time: Getting an appointment on NotaryCam usually takes 1 to 3 days. After the call, Intealth typically processes the form within one business day.
Step 3: Submitting Your Application for ECFMG Certification
Once your identity is verified and your account is active, you still cannot immediately register for the exam. You must first formally submit your Application for ECFMG Certification. This application confirms your intent to pursue U.S. licensure and officially collects your medical education history.
Here is exactly how to navigate this application within the new portal:
Phase 1: Accessing the Application
- Log into your MyIntealth Applicant Portal homepage.
- Click on “Services” in the top navigation menu.
- Select “ECFMG Certification” from the dropdown menu.
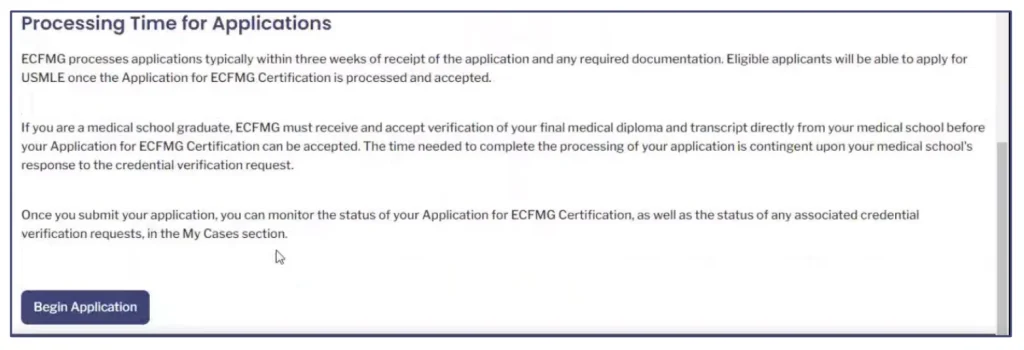
- Scroll to the bottom of the overview page and click “Begin Application”.

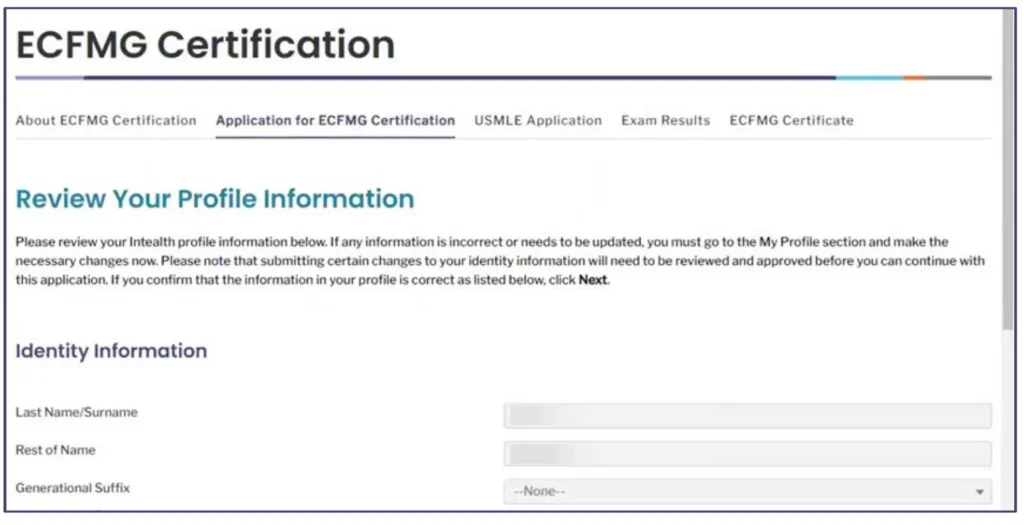
Phase 2: Reviewing Your Profile and Medical School
- Check the “Identity Information” section to confirm that all details are accurate.
- Update your identity profile if you spot any mistakes before moving forward.
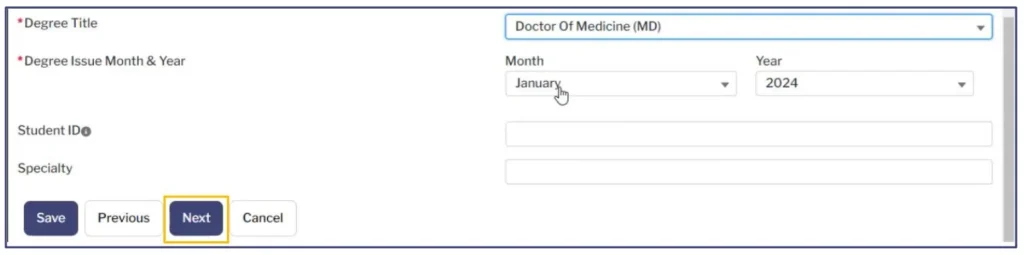
3. Review the “Degree Medical School and Graduation Information” section.
4. Confirm that the system verifies that your graduation year is included in your school’s ECFMG Sponsor Note.
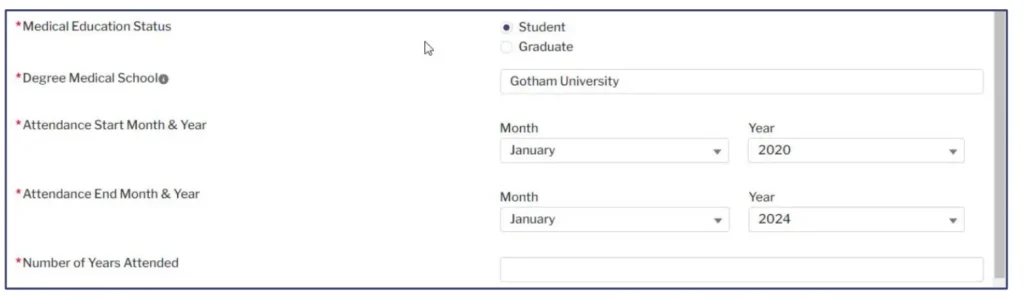
5. Proceed through the application as either a student or a graduate.

Phase 3: Documenting Transfer Credits and Other Schools
- Fill in the required details on the “Other Medical Schools Attended” page.
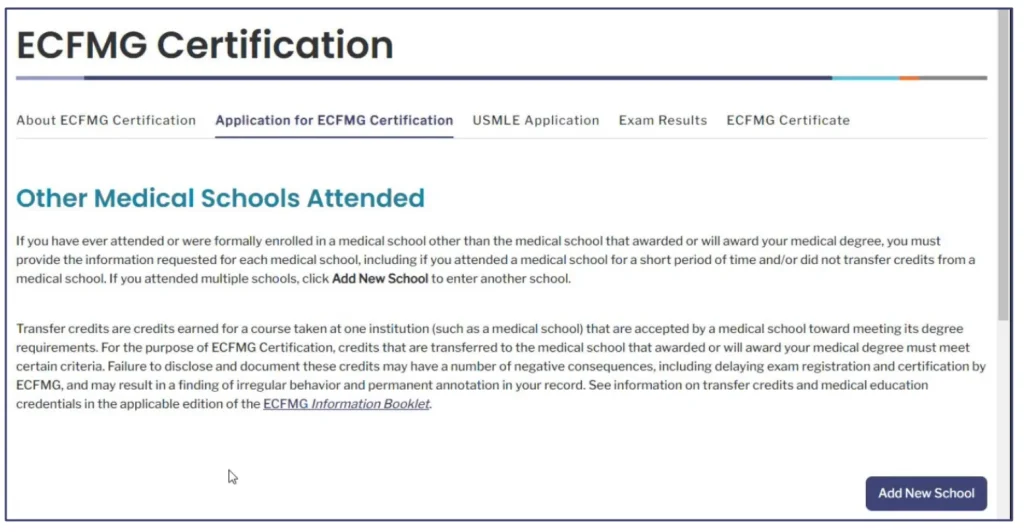
2. Click “Save” to record this information.
3. Check the box for “Transfer Credits Disclosure and Documentation” if you transferred credits to your primary medical school.
4. Enter your specific transfer credit details into the newly revealed section.
5. Click “Upload Files” to select your transcript.
6. Preview the document on your screen to ensure it is legible.
7. Click the disk icon to save the upload.

Phase 4: Handling Name Changes and Translations
- Locate the “Name on Document” question directly below the transcript upload.
- Check the box to clarify if the name on your transcript differs from your Intealth Profile name.
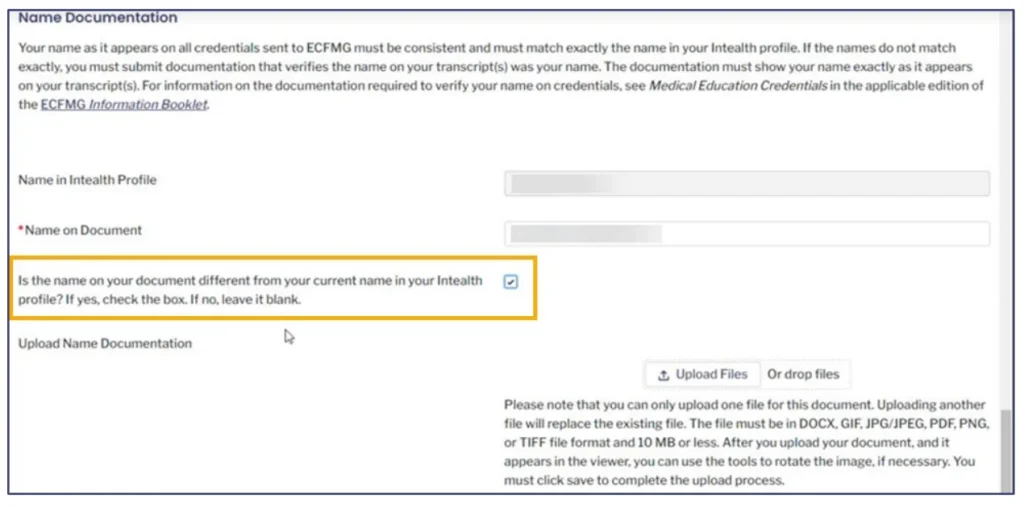
3. Upload your supporting legal name documentation and click the disk icon to save it.
4. Check the “Transcript Translation” box if your transcript is in a language other than English.
5. Upload the certified English translation.
Phase 5: Attestations and Payment
- Review all your submitted information on the “Summary” screen.
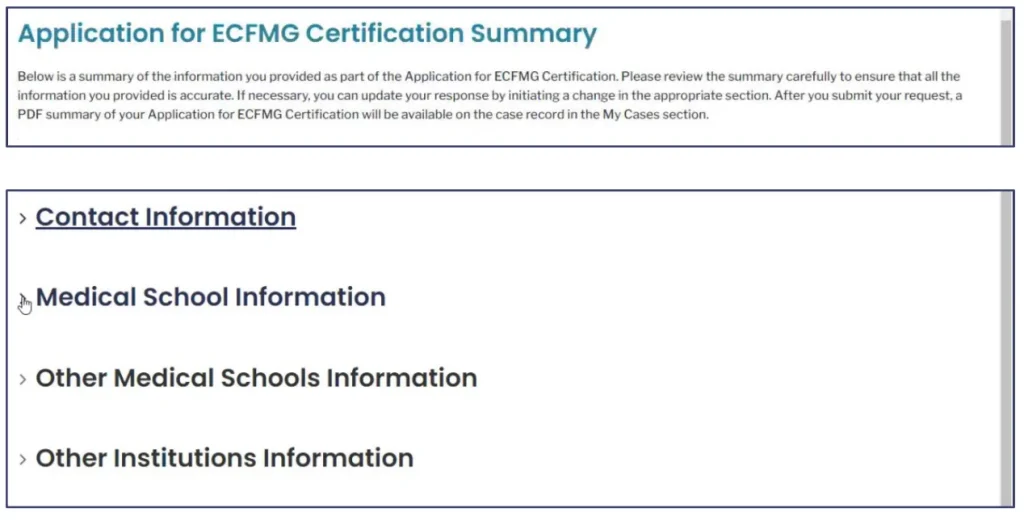
2. Make any necessary updates and click “Next”.
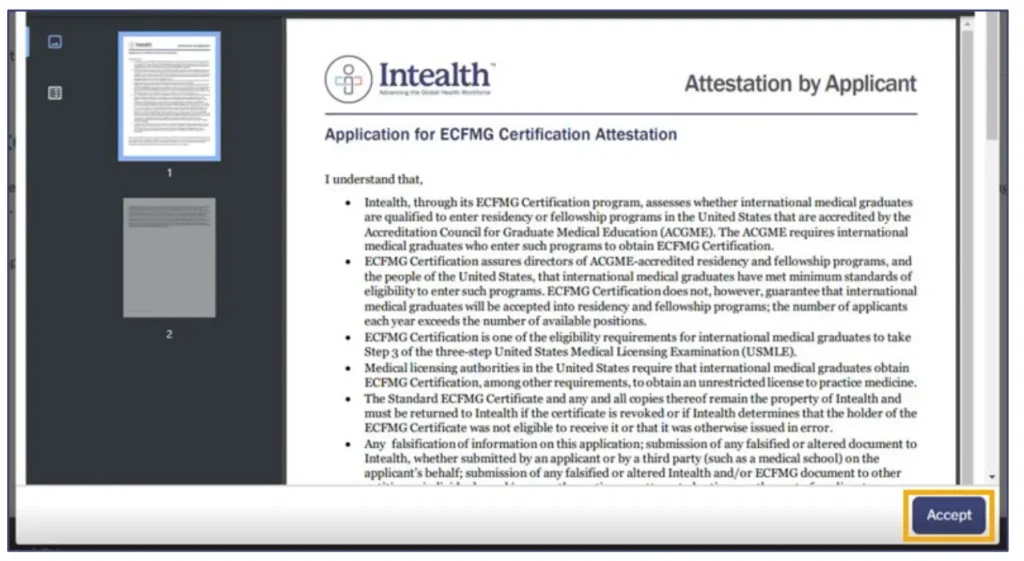
3. Click the attestation checkbox on the “Attestation by Applicant” page.
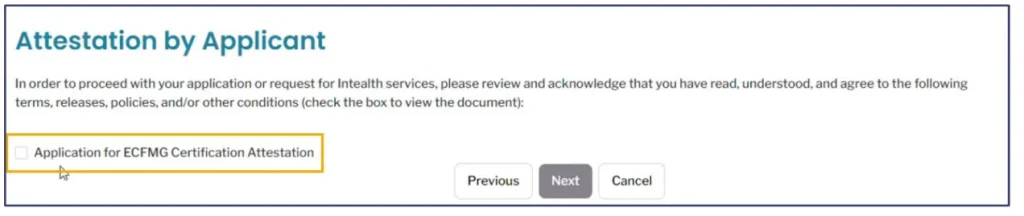
4. Read the legal agreements in the pop-up window and click “Accept”.
5. Process your payment for the application fee.
6. Write down the case number provided on the final confirmation screen so you can easily track your application status.
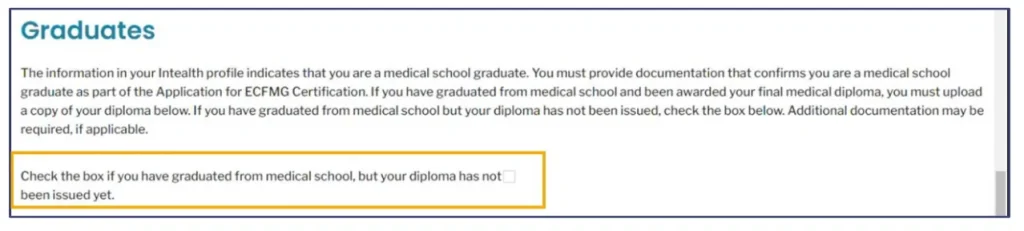
Note for Graduates: During this application, or immediately after, you will be required to upload your Final Medical Diploma and Final Medical Transcript to the portal so ECFMG can begin primary-source verification with your school.

- Cost
○ If you are a Graduate: You must upload a scanned copy of your Final Medical Diploma and Final Medical Transcript. At the time of upload, you will be charged a $220 Credential Verification fee ($110 per document) so Intealth can begin primary-source verification with your school.
○ If you are a Student: You do not need to upload a diploma. Intealth will verify your active student enrollment status directly with your medical school (usually electronically through the EMSWP portal, or via a paper form). - Estimated Time: The online submission is instant, but you will not be fully “eligible” to register for the USMLE until your school verifies your credentials. ECFMG takes about 3 weeks to review your uploaded documents and contact your school. If your school uses the electronic EMSWP portal, verification can happen in a matter of days. If your school is slower or relies on paper forms, this step can take anywhere from 2 to 6 weeks, and sometimes up to 2 to 4 months.
Step 4: Registering for the USMLE Step 1 Exam via the FSMB Portal
As of January 2026, ECFMG no longer handles USMLE exam registrations, scheduling permits, or score reporting. All international medical students and graduates must now register for Step 1 directly through the Federation of State Medical Boards (FSMB) USMLE Portal.
Important Note: You cannot begin this step until you have an accepted Application for ECFMG Certification (Step 3).
Here is exactly how to navigate the new FSMB portal:
Phase 1: Creating Your FSMB Account
- Go to the FSMB USMLE Portal and click Log In or Sign In at the top right.
- Click the “Sign up now” link under the login button.
- Enter your email address and click Send verification code. Once the code arrives in your email, enter it to verify.
- Set up your username and password, and enter your basic demographic information (First name, Last name, etc.).
- The system will ask for a numeric identifier. It is highly recommended to input your MyIntealth ID here so the systems can sync seamlessly.
Phase 2: The Intealth Eligibility Verification Checks
Once your account is created and you log in, you will not see the Step 1 application immediately. The FSMB portal must first securely communicate with Intealth (ECFMG) in the background to verify you are eligible to test.
- Identity Match: The portal will automatically check if your identifying information on FSMB perfectly matches your Intealth profile.
- Initial Eligibility Verification: If the identity match is successful, the portal will immediately check Intealth to ensure your Application for ECFMG Certification was accepted.
- Troubleshooting: If either check fails, the portal will give you an error message with instructions on how to resolve the discrepancy before you can proceed.
Phase 3: Submitting the Step 1 Application
- Once you pass both verification checks, the portal will unlock access to the Step exam applications. Click on the USMLE Step 1 tab.
- Fill out the application and select your preferred 3 month eligibility period.
- Select Your Testing Region: You will be prompted to select your testing region (e.g., U.S./Canada, India, Middle East, Europe). Do this carefully before checking out, as your choice dictates the international surcharges. Changing it later incurs an extra fee.
- Pay the Exam Fees: The base 2026 USMLE Step 1 exam fee is $695. If you test outside the U.S. or Canada, the international surcharge is $210, bringing the base international cost to $905. (Note: If you select India, a mandatory 18% GST of roughly $162 is added at checkout).
- Click Submit.
Timeline: Usually 3–5 business days
FSMB will send email updates throughout the approval process, and you can check your status at any time by logging back into the FSMB portal.
Extending the Eligibility Period
If you realize you aren’t ready to test within your original 3-month window, you can request a one-time, contiguous 3-month extension.
- The Cost: * $70–$100 Processing Fee: This fee is non-refundable. Most current 2026 sources list the FSMB extension fee at $70, though some regional processing may push it toward $100.
- Deadline: You must submit the request no later than 25 days after the end date of your original eligibility period.
Changing Your Testing Region
If you originally picked one region (e.g., Middle East) but decided to test in another (e.g., India or the US), this is a separate process.
- Cost: $90.
- Note: If the new region has a higher international surcharge than your original one, you will also have to pay the difference.
| Service | 2026 Cost (USD) | Important Timeline |
| Initial 3-Month Window | Included in $905 fee | Chosen at registration |
| 3-Month Extension | $70 | Apply up to 25 days after original window ends |
| Testing Region Change | $90 | Must be done before scheduling |
| Late Rescheduling | $0–$600+ | Depends on how close the exam date is |
Ace Your Step 1 with Expert Guidance.
Struggling with Step 1 preparation? Get personalized 1-on-1 coaching from top scorers and experienced mentors.
Step 5: Issuing the Scheduling Permit
Once your registration is fully processed and your eligibility is confirmed by both FSMB and Intealth (ECFMG), your Scheduling Permit will be issued. As of 2026, this is done exclusively through the FSMB portal.
Detailed Process:
- Notification: You will receive an automated email from FSMB stating that your permit is ready.
- Accessing the Permit: * Log in to the FSMB USMLE Portal.
○ Navigate to your dashboard and look for the “Print/Download Scheduling Permit” button under your active Step 1 application. - Critical Information Check: Verify that your name on the permit matches your passport exactly. Even a small typo can result in you being turned away at the Prometric center.
- Save Your CIN: Your permit contains your Candidate Identification Number (CIN). You will need this both to schedule your exam and to log in to the computer on your actual test day.
- Cost: None (included in your registration fee).
- Estimated Time: Typically issued within 3 to 5 business days after your registration is approved.
Important: You can present your permit at the test center either as a printed hard copy or electronically (e.g., on your smartphone), but it is highly recommended to have a printed backup in case of technical issues.
Step 6: How to Schedule Your USMLE Step 1 Exam at Prometric
With your permit and CIN in hand, you can finally lock in your specific test date and location.
Detailed Process:
- Visit Prometric: Go to the USMLE page on the Prometric website.
- Locate a Center: Use the “Seat Availability” tool to find a test center in your chosen region. You don’t need your permit just to browse dates, but you need it to book.
- Start Scheduling: Click “Schedule” and select “USMLE Step 1.”
- Enter Permit Details: You will be prompted to enter your Scheduling # (CIN) and the first four characters of your Last Name exactly as they appear on your permit.
- Select Date and Time: Choose an available date within your 3 month eligibility period.
- Confirmation: Once you complete the booking, you will receive a Prometric Confirmation Number. Save this; you will need it if you ever need to reschedule or cancel your appointment.
- Cost: None for the initial booking.
- Rescheduling Fees: If you reschedule more than 46 days before your test date, there is no fee. If you reschedule between 1 and 45 days before, Prometric will charge a fee (ranging from roughly $35 to $600, depending on how close you are to the date).
- Estimated Time: Instant confirmation upon booking.
Registration for U.S. and Canadian Medical Students
If you are a student or graduate of an LCME or COCA-accredited medical school in the United States or Canada, you will not use MyIntealth or FSMB. Instead, your entire registration is centralized through the NBME. As of March 2025, the NBME retired the old NLES system, meaning all students must now use the newly launched MyUSMLE Portal.
Here is exactly how to navigate the domestic registration process:
Step 1: Create Your MyUSMLE Account & Verify Identity
Unlike IMGs, who must schedule a live video call with a notary, U.S. and Canadian students use an automated identity verification system.
Phase 1: Accessing the Portal
- Navigate to the NBME website and locate the login page for the MyUSMLE Portal.
- If you have never taken an NBME self-assessment or USMLE exam before, click “Create Account.”
- Enter your legal first and last name exactly as they appear on your government-issued ID (driver’s license or passport).
- Enter your email address, date of birth, and medical school details, then click “Submit.”
- The system will generate your unique USMLE ID and email you a link to finalize your password.
Phase 2: Identity Verification via ID.me
- Once logged into the MyUSMLE Portal, you will be prompted to complete the mandatory identity verification.
- Click the prompt to be redirected to ID.me (a secure, third-party identity verification service).
- Upload a clear, high-quality photo of your unexpired government-issued ID (such as a state driver’s license or U.S. passport).
- Follow the on-screen instructions to use your phone or computer webcam to take a quick “video selfie.”
- The automated system usually verifies your identity within 5 to 10 minutes. Once approved, you are securely routed back to the MyUSMLE dashboard.
Step 2: Submitting the Step 1 Application
With your identity verified, you can now officially apply for your testing window.
Phase 1: Starting the Application
- On your MyUSMLE dashboard, click on the My Exams tab.
- Select New Application and choose USMLE Step 1.
- Review your auto-populated personal information to ensure there are no spelling errors.
Phase 2: Selecting Your Eligibility Period and Region
- You will be prompted to select your Eligibility Period. This is the 3-month window during which you plan to take the exam (e.g., May–June–July).
- Select your testing region. If you are taking the exam within the U.S. or Canada, simply select “United States and Canada.”
- Answer the mandatory questions regarding any test accommodations you may need under the Americans with Disabilities Act (ADA).
Phase 3: Attestations and Payment
- Review the “Application Summary” screen to ensure your selected eligibility period and medical school information are perfectly accurate.
- Read the legal agreements and click the certification box to agree to the USMLE Bulletin of Information rules.
- Proceed to the checkout screen to pay the 2026 NBME Step 1 exam fee of $695. (Note: If you choose to test outside the U.S. or Canada, an international surcharge of $210 will be added to your cart).
Step 3: Medical School Verification
Unlike the IMG process where you upload your own diplomas or transcripts, U.S. and Canadian students rely on their medical schools to verify their status directly with the NBME.
Phase 1: The Electronic Verification
- Once you hit “Submit” and pay your fee, your application is automatically flagged in a separate system called the MyNBME Services Portal.
- The registrar or the Office of Student Affairs at your medical school will log into this portal on their end.
- Your school official will digitally confirm that you are currently enrolled and in good academic standing.
Phase 2: Application Approval
- You do not need to do anything during this phase except wait.
- Because this relies on your specific school’s administrative staff, it can take anywhere from a few days to a few weeks. (Pro-tip: If your application has been pending for over two weeks, politely email your school’s registrar to remind them to verify your NBME status).
Step 4: Receiving Your Permit and Scheduling
Once your school clicks the approval button, the NBME finalizes your registration.
Phase 1: Downloading the Permit
- You will receive an automated email from the USMLE community stating that your registration is complete.
- Log back into the MyUSMLE Portal.
- Click on your active Step 1 application and click the button to Download Scheduling Permit.
- Save this PDF and print a physical copy. You must have the specific Candidate Identification Number (CIN) printed on this permit to book your test.
Phase 2: Booking via Prometric
- Go to the USMLE page on the Prometric website and click Schedule.
- Enter your CIN and the first four letters of your last name to log in.
- Search for testing centers near you and select an exact test date that falls within your approved 3-month eligibility period.
- Confirm your booking and save the 16-digit Prometric Confirmation Number provided on the final screen.
Check out our video for more tips on how to ace your STEP1.
Frequently Asked Questions (FAQs)
How much does the USMLE Step 1 cost in 2026?
The base 2026 USMLE Step 1 exam fee is $695. If you test outside the U.S. or Canada, the international surcharge is $210, bringing the base international cost to $905. Keep in mind that if you select India as your testing region, a mandatory 18% GST of roughly $162 is added at checkout.
If you want a full breakdown of the total cost of the USMLE journey, from registration all the way to the residency match, check out our detailed guide here.
How long does MyIntealth identity verification take?
Scheduling and completing your brief video call appointment on NotaryCam usually takes 1 to 3 days. After the call concludes, Intealth typically processes the verified form within one business day.
What is the FSMB international testing surcharge?
The FSMB international testing surcharge is an additional $210 fee applied to your registration if you choose to take the exam outside of the U.S. or Canada.
Can I change my USMLE Step 1 testing region?
Yes, if you decide to test in a different region, you can change it for a $90 fee. This change must be done before you schedule your appointment at Prometric. Note that if the new region has a higher international surcharge than your original one, you will also have to pay the difference.
How much does ECFMG Certification cost in 2026?
The base fee for the Application for ECFMG Certification is $580. If you have already graduated from medical school, you will also need to pay a $220 Credential Verification fee when you upload your final medical diploma and transcript for primary-source verification.
Do US medical students and IMGs use the same portal for USMLE registration?
No, the registration pathways are completely different. As of 2026, International Medical Graduates (IMGs) must use MyIntealth to establish their credentials and the FSMB portal to actually register for the USMLE Step 1 exam. Meanwhile, medical students and graduates from the United States and Canada register for their exams directly through the National Board of Medical Examiners (NBME)
Summary
Registering for the USMLE Step 1 in 2026 may seem complicated at first, but once you understand the correct pathway, the process becomes much more manageable.
If you are an International Medical Graduate (IMG), your journey starts with creating a MyIntealth account, completing identity verification through NotaryCam, obtaining ECFMG certification, and finally registering for the exam through the FSMB portal.
If you are a U.S. or Canadian medical student, your process is more streamlined, with registration handled directly through the NBME and verification completed by your medical school.
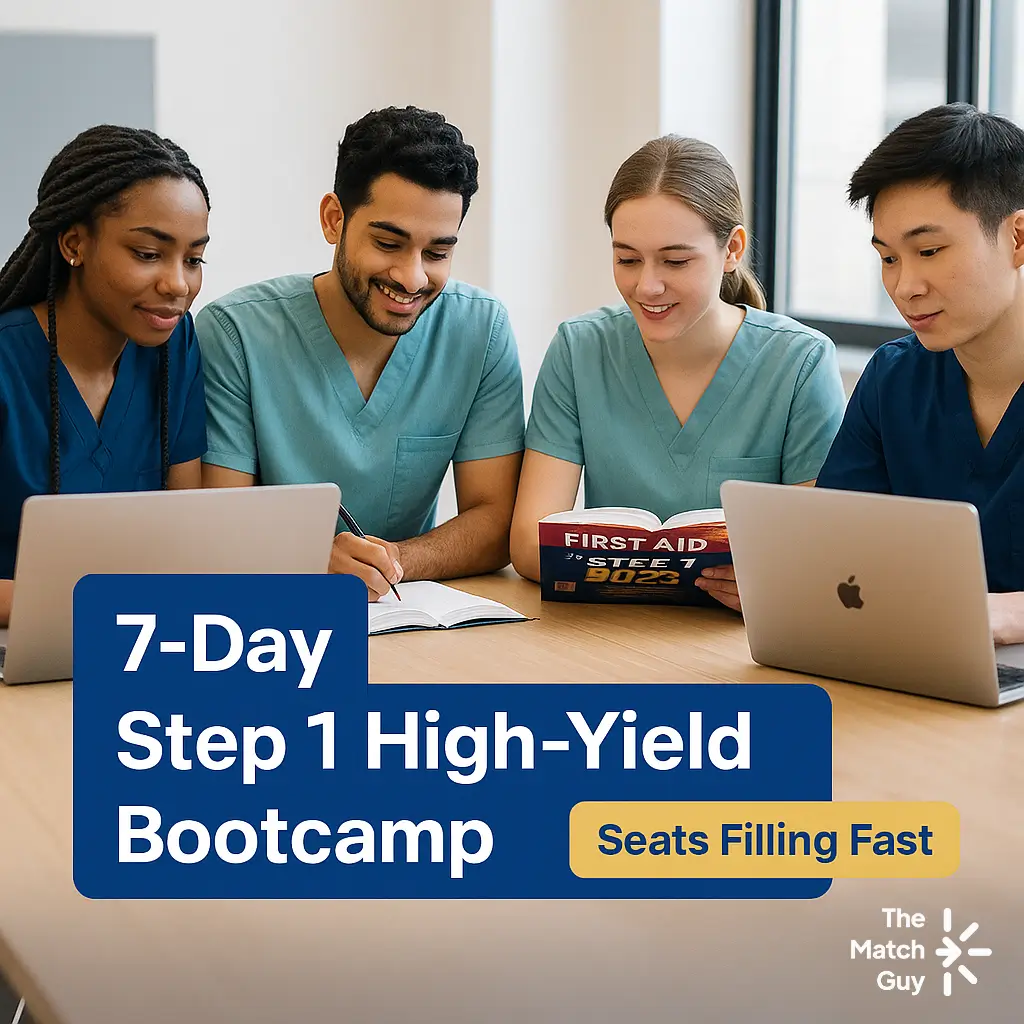
Looking for a structured, rapid-review program? Join our 7-Day High-Yield STEP 1 Bootcamp, where we cover the most commonly tested topics, clinical reasoning skills, and biostatistics essentials. Learn more and enroll HERE.
If you have any questions about which option is right for you, feel free to talk to us HERE or email us at info@tmg.wpcodix.com.
We wish you best of luck on your STEP 1 exam. If you found this article helpful, share it with friends or classmates who are preparing for the exam.
Latest Articles
2026 Residency Personal Statement The Ultimate Guide to Crafting Your Residency Personal Statement
Malke Asaad
July 8, 2024

Best Resources for USMLE STEP 1! How to Study and Prepare for STEP1?
Malke Asaad
August 12, 2022
ERAS Application 2026 Guide! How to Fill Out ERAS Residency Application?
Malke Asaad
July 13, 2023
Need Help?
About TheMatchGuy
The Match Guy is a premier medical consulting firm trusted by over 35,000 students worldwide. We help medical students and graduates excel on the USMLE (Step 1, Step 2 CK, and Step 3) and strengthen their residency applications through proven study strategies, expert tutoring, and personalized guidance from elite 260+ scoring tutors who have helped countless students achieve their goals. Whether you’re aiming for a competitive specialty or navigating the Match as an IMG, we help you prepare smarter, avoid burnout, and position yourself as a strong applicant from exam day through Match season. Schedule a FREE discovery call now.
RECOMMENDED ARTICLES
Step 1 Sample Test Answers + Explanations 2026

High-Yield USMLE Step 1 Topics You Must Know (2026)
Step 2 Sample Test Answers + Explanations 2026